Accurate land surveying relies heavily on the precision of the equipment used to collect data. Misaligned or poorly calibrated equipment can result in significant errors, impacting the overall quality and reliability of a survey. Therefore, to maintain high accuracy in land surveying, it is essential to regularly calibrate your equipment.
Preparation Before Calibration
Before you begin the process of calibrating your land surveying equipment, there are a few key steps to follow that will ensure a smooth and successful calibration. Here’s a rundown of these steps.
Reading the Equipment User’s Manual
- Familiarize Yourself with the Equipment: Make sure you fully understand the function of each part of your equipment. This includes how to adjust different settings and how to interpret readings.
- Understand the Calibration Process: The user manual will provide specific instructions on calibrating the equipment. It’s essential to follow these instructions closely to ensure accurate calibration.
Safety Measures When Handling Survey Equipment
- Handle with Care: Always handle your equipment gently to avoid damaging sensitive parts. This is especially important for optical instruments, which can easily be thrown out of alignment.
- Wear Protective Gear: When necessary, wear protective gear. This may include safety goggles, gloves, and steel-toed boots. Check the equipment’s manual for any specific safety instructions.
Cleaning and Basic Maintenance and Equipment
- Cleaning: Before you begin calibration, clean your equipment. Use a soft brush to remove dirt from moving parts and a lens cleaner for optical elements.
- Check for Damage: Inspect your equipment for any visible signs of wear or damage. This could include scratches on lenses, loose components, or dents on the body of the instrument.
- Battery Check: Ensure that your equipment’s battery is fully charged before beginning the calibration process. A dying battery can result in erroneous readings.
Calibrating the Total Station

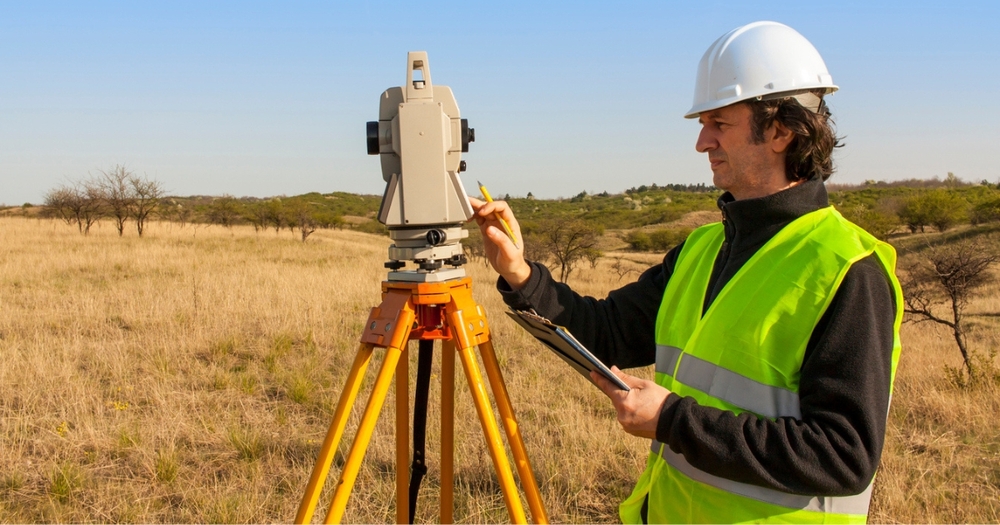
Total stations are a fundamental tool for land surveyors due to their ability to measure angles and distances with high accuracy. Proper calibration is key to the optimal functioning of this tool. Below, we delve into the primary steps to calibrate a total station.
Calibrate the Horizontal and Vertical Collimation
Collimation error happens when the line of sight is not parallel to the collimation axis. Here’s how to calibrate:
- Set the total station over a stable point and center it using the optical plummet.
- Aim the telescope at a target approximately 60 meters away and record the horizontal circle reading.
- Rotate the instrument 180 degrees and record the horizontal circle reading again.
- The difference between the readings should be 180 degrees. If not, adjust the collimation screw halfway of the error and recheck.
- Follow similar steps for the vertical collimation. The difference in readings should be zero. Adjust as necessary.
Compensator Adjustment
The compensator is crucial for automatically correcting small tilts in the instrument. To adjust:
- Set the total station over a point and level it.
- Aim at a staff approximately 30 meters away and take a reading.
- Rotate the instrument 180 degrees and take another reading.
- If the readings differ, adjust the compensator screw halfway of the error and repeat until satisfied.
Adjusting the Optical Plummet
The optical plummet ensures the total station is accurately positioned over a point on the ground. To calibrate:
- Set the instrument over a point with a clear mark.
- Look through the optical plummet. The mark should appear centered.
- If the mark is not centered, adjust the screws of the optical plummet until it is.
Finalizing and Testing the Calibration
After all adjustments, it’s essential to recheck all measurements:
- Perform all the above steps again to ensure all errors are corrected.
- Run a set of control measurements on a known area to verify the instrument’s accuracy.
Calibrating the Theodolite

Theodolites, used primarily for measuring horizontal and vertical angles, are a crucial piece of surveying equipment. Proper calibration ensures the accuracy of these measurements. Below, we explore the steps to calibrate a theodolite.
Vertical and Horizontal Angle Calibration
Misalignment of the horizontal and vertical angles can result in significant errors. Here’s how to calibrate them:
- Set up the theodolite on a flat and stable surface. Level the instrument.
- Point the theodolite towards a well-defined target approximately 50 meters away. Record the horizontal and vertical readings.
- Rotate the telescope 180 degrees in the vertical plane and retake the readings.
- Ideally, the horizontal reading should be 180 degrees different, and the vertical reading should be identical to the first reading. If not, adjust the horizontal and vertical collimation screws halfway of the discrepancy and repeat until accurate.
Adjusting the Optical Plummet
The optical plummet ensures the theodolite is accurately set up over a survey point. Here’s how to calibrate it:
- Set up the theodolite over a point with a clear mark on the ground.
- Look through the optical plummet. The ground mark should be centered.
- If the ground mark is not centered, adjust the optical plummet’s screws until it is.
Plate Level Calibration
The plate level is a bubble level used to level the theodolite during setup. To calibrate:
- Set up the theodolite on a stable surface.
- Note the position of the bubble.
- Rotate the theodolite 180 degrees. The bubble should return to the same position. If not, adjust the leveling screw halfway of the error.
- Repeat this process in two perpendicular directions to ensure accuracy.
Validating the Calibration
After adjusting all settings, it’s essential to verify the calibration:
- Repeat the above steps to ensure all errors have been corrected.
- Perform a set of control measurements on a known area to validate the instrument’s accuracy.
Calibrating Auto Levels/Transits

Auto levels, also known as transits, are optical instruments used for establishing or verifying points on the same horizontal plane. It is important to regularly calibrate these devices to maintain their precision. Below, we detail the steps involved in calibrating an auto level/transit.
Leveling the Base
The base of the level must be perfectly horizontal for accurate readings. Here’s how to level the base:
- Set up the level on a tripod at a point with a good view of the area you’ll be surveying.
- Use the bubble vial on the base of the level to adjust the level of the tripod head until the bubble is centered.
Adjusting the Line of Sight
The line of sight of the level must be parallel to the base. Here’s how to adjust it:
- Point the level towards a graduated rod about 30 meters away and record the reading.
- Rotate the level 180 degrees and point it toward a rod at the same distance in the opposite direction and record the reading.
- The readings should be identical. If they’re not, adjust the line of sight screws halfway of the discrepancy and repeat the process until the readings match.
Compensator Adjustment
The compensator is a device that automatically corrects for small tilts in the level. To adjust the compensator:
- Set up the level over a point and take a reading on a rod about 30 meters away.
- Rotate the level 180 degrees and take another reading at the same rod.
- If the readings differ, adjust the compensator screws halfway of the error and repeat the process until the readings match.
Confirmation of Calibration Correctness
After making all the adjustments, it’s vital to confirm that the calibration is correct:
- Repeat all of the above steps to ensure that all discrepancies have been corrected.
- Perform a set of control measurements on a known area to verify the level’s accuracy.
Post-Calibration Maintenance and Storage
Taking care of your surveying equipment post-calibration is just as important as the calibration process itself. The longevity and performance of your tools largely depend on the maintenance and storage practices you adhere to. Let’s discuss key considerations for maintaining and storing your equipment.
Maintenance After Calibration
- Cleanliness: Keep your equipment clean at all times. Dust and dirt can degrade your equipment’s accuracy over time. Use a soft brush and lens cleaner for the optical parts, and a damp cloth for the rest of the instrument.
- Regular Checks: Regularly check the performance of your equipment. This includes checking for loose screws, bubbles in spirit levels, and the accuracy of the compensator.
- Handling: Always handle the equipment with care. Avoid dropping or bumping the equipment, which could cause misalignment and other issues.
- Professional Servicing: Depending on the equipment’s usage and exposure to environmental conditions, consider professional servicing annually or bi-annually.
Proper Storage of Calibrated Equipment

- Storage Case: Always store your equipment in its designated case. The case is designed to hold the equipment securely and protect it from dust, humidity, and physical shocks.
- Environmental Conditions: Store the equipment in a dry, cool, and dust-free environment. Extreme temperatures and humidity can damage the sensitive parts of the equipment.
- Positioning: Ensure that equipment like total stations or theodolites are stored in the correct orientation, typically with the base down. Check your equipment’s manual for specific instructions.
Periodic Re-Calibration: When and Why It’s Necessary
- Regular Usage: If the equipment is regularly used, calibration should be checked more frequently. High-usage equipment should be checked every few months.
- After a Fall or Bump: If the equipment has fallen or been bumped, it should be checked and recalibrated if necessary, even if there’s no visible damage.
- Inconsistent Readings: If you start getting inconsistent or unexpected results, it indicates that your equipment needs to be recalibrated.
Optimizing Surveying Equipment
Calibrating your land surveying equipment is an essential task that should never be overlooked. It ensures that your equipment performs at its best, providing the most accurate data for your projects. By following the detailed steps outlined in this guide, you can calibrate different types of surveying equipment with confidence and precision.
